
Maybe the nearest gym is 30 minutes away. Maybe you're traveling. Maybe you just don't want to pay $50 a month to wait in line for a squat rack. Whatever the reason, you want to train at home, and you want it to actually work.
Good news: it can. People built impressive physiques long before commercial gyms existed. Gymnasts develop extraordinary upper body strength almost entirely through bodyweight training. Calisthenics athletes move with a level of control that most gym-goers can't match.
The catch is that home training requires a bit more creativity. You can't just slap more plates on a barbell. But with the right progressions, programming, and mindset, you can build serious strength and muscle without ever stepping foot in a gym. The same principle of progressive overload applies — you just use different tools to get there.
The Five Movement Patterns You Need
Every effective training program — home or gym — is built around fundamental human movement patterns. Cover these five, and you've covered your entire body.
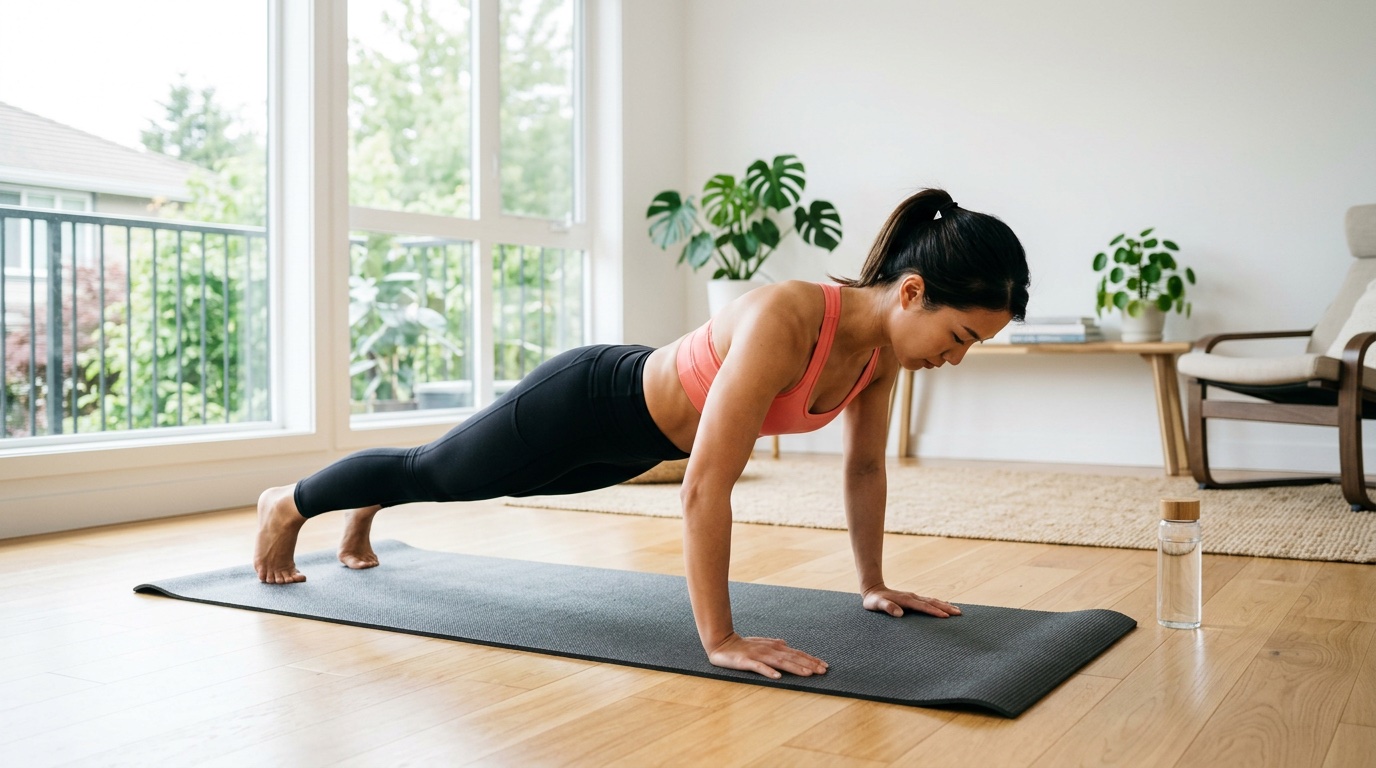
1. Push (Chest, Shoulders, Triceps)
The push-up is the foundation, but "just do push-ups" isn't a program. It's a starting point. The key is having a progression ladder that keeps the movement challenging as you get stronger.
Beginner to Advanced Progression:
- Wall push-ups → Incline push-ups (hands on chair) → Standard push-ups → Diamond push-ups → Decline push-ups (feet elevated) → Archer push-ups → One-arm push-up progression
For shoulders specifically:
- Pike push-ups → Elevated pike push-ups (feet on chair) → Wall handstand push-ups (with wall support) → Freestanding handstand push-ups
Each step in the progression significantly increases difficulty. When you can do 3 sets of 12–15 reps with good form at one level, move to the next.
2. Pull (Back, Biceps)
This is the hardest category to train at home because gravity works against you. Pushing your body away from the floor is straightforward. Pulling your body toward something requires a fixed overhead point.
If you have a pull-up bar (the single best home equipment investment):
- Dead hangs → Scapular pulls → Negative pull-ups (jump up, lower slowly) → Band-assisted pull-ups → Pull-ups → Weighted pull-ups (backpack with books) → Archer pull-ups → One-arm pull-up progression
If you have absolutely nothing:
- Doorframe rows (grip the frame, lean back, pull yourself in) → Table rows (lie under a sturdy table, pull chest to table edge) → Towel rows (loop a towel over a door, grip both ends, row)
Pull training without equipment is genuinely difficult to program well. A pull-up bar or a set of resistance bands changes everything for home training — more on equipment priorities later.
3. Squat (Quads, Glutes)
Bodyweight squats get easy quickly for most people. The progression ladder is critical here.
Progression:
- Assisted squats (holding something for balance) → Air squats → Pause squats (3-second hold at bottom) → Bulgarian split squats (rear foot on chair) → Pistol squat progression (assisted → partial range → full) → Shrimp squats
4. Hinge (Hamstrings, Glutes, Lower Back)
The hip hinge is the hardest pattern to load at home without equipment, but several bodyweight options exist.
Progression:
- Glute bridges → Single-leg glute bridges → Hip thrusts (shoulders on couch) → Single-leg hip thrusts → Nordic curl progression (kneeling, anchor feet, slowly lower yourself) → Sliding leg curls (socks on smooth floor, or towel on tile)
Nordic curls deserve special attention. They're one of the most effective hamstring exercises in existence — research shows they reduce hamstring injury risk by up to 51%. The progression is steep: start with slow negatives, and over weeks, build toward controlling the full range of motion.
5. Core (Abs, Obliques, Lower Back)
Bodyweight core training is arguably better than anything you can do in a gym.
Progression:
- Dead bugs → Planks → Side planks → Hollow body holds → L-sits (on floor or chairs) → Ab wheel rollouts (or towel rollouts on smooth floor) → Dragon flags
Don't neglect anti-rotation and anti-extension work. Planks and their variations train the core's primary function — resisting unwanted movement — more effectively than endless crunches.
The 4-Week Home Workout Program
This program uses three training days per week with one day of rest between sessions. It's designed for someone with moderate training experience and access to a pull-up bar. Modifications for no equipment are noted.
Schedule
- Day A: Push + Squat focus
- Day B: Pull + Hinge focus
- Day C: Full body + Core focus
Week example: Monday (A), Wednesday (B), Friday (C), with weekends off.
Day A: Push + Squat
| Exercise | Sets | Reps | Rest |
|---|---|---|---|
| Pike push-ups | 3 | 8–12 | 90s |
| Push-up variation (at your level) | 4 | 8–15 | 60s |
| Bulgarian split squats | 3 | 10–12 each leg | 90s |
| Pause air squats (3s hold) | 3 | 15–20 | 60s |
| Diamond push-ups | 3 | to failure | 60s |
| Wall sit | 2 | 30–60 seconds | 45s |
Day B: Pull + Hinge
| Exercise | Sets | Reps | Rest |
|---|---|---|---|
| Pull-ups (at your progression level) | 4 | 5–10 | 2 min |
| Inverted rows (table or bar) | 3 | 8–12 | 90s |
| Single-leg glute bridges | 3 | 12–15 each leg | 60s |
| Nordic curl negatives | 3 | 5–8 (slow lower) | 90s |
| Towel curls (isometric or dynamic) | 3 | 10–15 | 45s |
| Sliding leg curls | 2 | 10–12 | 60s |
No pull-up bar: Replace pull-ups with doorframe pulls or towel rows. Replace inverted rows with backpack rows (fill a backpack, row it).
Day C: Full Body + Core
| Exercise | Sets | Reps | Rest |
|---|---|---|---|
| Archer push-ups (or hardest push variation) | 3 | 6–8 each side | 90s |
| Chin-ups (underhand pull-ups) | 3 | 6–10 | 90s |
| Pistol squat progression | 3 | 5–8 each leg | 90s |
| Single-leg hip thrusts | 3 | 10–12 each leg | 60s |
| Hollow body hold | 3 | 20–30 seconds | 45s |
| Side plank | 2 | 30–45 seconds each | 30s |
| Dead bugs | 2 | 12–15 each side | 30s |
Progression Protocol
Each week, try to add 1–2 reps to each exercise. When you hit the top of the rep range for all sets, move to the next exercise in the progression ladder. After 4 weeks, take a deload week (reduce sets by half, same exercises), then start a new 4-week block with updated progressions.
How to Make Bodyweight Exercises Harder (Without Equipment)
Once standard push-ups and squats become easy, you need strategies to keep progressing.
Slow Down the Eccentric
Add Pauses
Hold the bottom position for 2–3 seconds. This eliminates the stretch-shortening cycle (the "bounce" that helps you out of the bottom) and forces your muscles to produce force from a dead stop.
Go Unilateral
Single-arm push-ups. Single-leg squats. Single-leg hip thrusts. Going from bilateral to unilateral essentially doubles the load on the working limb.
Increase Range of Motion
Deficit push-ups (hands on books or yoga blocks) and deep step-ups require more work through a longer range. More range equals more muscle activation.
Reduce Leverage
Extending your arms changes the lever arm and makes exercises harder. An ab wheel rollout is dramatically harder than a plank even though both are anti-extension exercises — the longer lever is the difference.
Use 1.5 Reps
Go all the way down, come halfway up, go back down, then come all the way up. That's one rep. This technique increases time under tension at the most challenging part of the range.
Minimal Equipment Priority List
If you have some budget for equipment, here's what to buy and in what order. Each addition dramatically expands your exercise options.
Priority 1: Pull-Up Bar ($20–40)
A doorframe pull-up bar is the single highest-value piece of home equipment. It unlocks pull-ups, chin-ups, hanging leg raises, inverted rows (if it's low enough or adjustable), and dead hangs. Without it, back training at home is severely limited.
Priority 2: Resistance Bands ($15–35 for a set)
Bands add variable resistance to any movement and enable exercises that are impossible with bodyweight alone — particularly for back work. Band pull-aparts, banded rows, banded face pulls, and assisted pull-ups are all valuable. A set of 3–5 bands with different resistance levels covers a huge range.
Priority 3: Adjustable Dumbbells ($100–300)
If budget allows, adjustable dumbbells transform home training. Suddenly you can do dumbbell rows, presses, curls, Romanian deadlifts, goblet squats, and lateral raises. They take up minimal space and replace an entire rack of fixed dumbbells.
Priority 4: Dip Bars or Gymnastic Rings ($30–80)
Dip bars add a pressing movement that bodyweight push-ups can't fully replicate. Gymnastic rings (hung from a pull-up bar or ceiling mount) are even more versatile — ring push-ups, ring dips, ring rows, and ring muscle-ups.
Nour's exercise library lets you filter by equipment — including "no equipment" — so you can see every exercise available for your exact setup and swap movements in and out of your program as you add gear.
When to Join a Gym
Home training is effective, but it does have ceilings. Here's when a gym becomes worth considering:
- Your legs need heavy loading. Eventually, bodyweight leg exercises plateau for muscle growth. Barbell squats, leg presses, and Romanian deadlifts are hard to replicate at home.
- You want to specialize. If your goal is powerlifting, Olympic lifting, or heavy strength training, you need barbells and a rack.
- Isolation work matters to you. Cable machines provide constant tension through a full range of motion that's difficult to replicate with bands or bodyweight.
- You've outgrown your progressions. If you can do 10+ one-arm push-ups and full pistol squats with a slow eccentric, you've exhausted most of the bodyweight progression ladders.
For many people — especially those focused on general fitness, aesthetics, and functional strength — home training can work for months or years before hitting these ceilings.
Programming Your Home Training Long-Term
The 4-week program above is a starting point. For sustained progress, rotate through different training emphases every 4–6 weeks.
Block 1 (Weeks 1–4): Moderate reps (8–12), focus on double progression.
Block 2 (Weeks 5–8): Higher reps (15–20) with tempo manipulation. Slow eccentrics, pauses, 1.5 reps.
Block 3 (Weeks 9–12): Strength focus. Harder progressions (one-arm, pistol squat, handstand push-up), lower reps (5–8), longer rest.
Week 13: Deload. Reduce volume by 50%, keep exercises the same.
Repeat with updated progressions. Every 12-week cycle, you should be working on harder exercise variations than the previous cycle. That's progressive overload applied to bodyweight training.
Nour offers home-specific programs with bodyweight progressions, day-by-day guidance, and exercise filtering by available equipment.
Try Nour FreeThe Bottom Line
You don't need a gym to build a strong, muscular, capable body. You need:
- A clear progression system for each movement pattern
- Consistency — three sessions per week, every week
- Patience — bodyweight training rewards those who master the basics before chasing advanced skills
- Creativity — use tempos, pauses, unilateral work, and range of motion to keep things challenging
- Minimal equipment — even just a pull-up bar changes the game
Stop waiting for the perfect gym setup. Start training with what you have, progress systematically, and let the results prove that the best gym is the one you'll actually use — even if it's your living room floor.